When multiple people share the same Unix account, it can be difficult to track who actually accessed the server and when. This becomes a serious problem if an unapproved change is made—you need to know which key was used to gain access.
Fortunately, OpenSSH can log the public key fingerprint used on login. With a few small changes, you can get clear, timestamped records of which key was used, from where, and when.
Step 1: Enable Verbose Logging in sshd
By default, sshd only logs that a login was accepted. To see the fingerprint of the key used, enable verbose logging:
|
1 2 3 4 5 6 7 8 9 10 11 |
sudo cp -a /etc/ssh/sshd_config /etc/ssh/sshd_config.bak.$(date +%F_%T) if grep -qE '^\s*LogLevel' /etc/ssh/sshd_config; then sudo sed -i 's/^\s*LogLevel.*/LogLevel VERBOSE/' /etc/ssh/sshd_config else echo 'LogLevel VERBOSE' | sudo tee -a /etc/ssh/sshd_config fi # Reload safely (name differs by distro) sudo systemctl reload sshd || sudo systemctl reload ssh |
This instructs sshd to log key fingerprints on successful login.
Step 2: Know Where to Look
Where the logs appear depends on your distro and logging setup:
- RHEL / CentOS / AlmaLinux / Rocky:
/var/log/secure - Debian / Ubuntu:
/var/log/auth.log - Systemd-only setups: logs are in the journal, accessible via
journalctl
Examples:
|
1 2 3 4 5 6 7 |
# Journald sudo journalctl -u sshd -S "24 hours ago" | grep 'Accepted publickey' # File-based sudo grep 'Accepted publickey' /var/log/auth.log* sudo grep 'Accepted publickey' /var/log/secure* |
Step 3: Sample Output
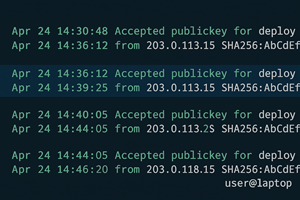
Once LogLevel VERBOSE is set, successful logins look like this:
|
1 2 |
Accepted publickey for deploy from 203.0.113.15 port 51432 ssh2: ED25519 SHA256:AbCdEfGhIj... user@laptop |
The important parts are:
- user: the Unix account (e.g.
deploy) - src: the source IP
- fp: the SHA256 fingerprint of the key
- comment: whatever was in the key’s comment field (
user@laptop)
Step 4: Map Fingerprints to People
To resolve fingerprints to actual keys in your authorized_keys files:
|
1 2 3 4 5 6 7 8 9 10 11 12 |
sudo bash -c ' for f in /root/.ssh/authorized_keys /home/*/.ssh/authorized_keys /etc/ssh/authorized_keys/*; do [ -f "$f" ] || continue owner=$(stat -c "%U" "$f") awk "NF>=2 {print \$1, \$2, substr(\$0, index(\$0, \$3))}" "$f" \ | while read -r type key comment; do fp=$(ssh-keygen -lf <(echo "$type $key") -E sha256 | awk "{print \$2}") echo "$fp file=$f owner=$owner comment=${comment:-<no-comment>}" done done | sort -u ' |
This generates a lookup table of fingerprints → files → owners → comments.
Now you can match the fingerprint in your logs back to the individual’s key.
Step 5: Bonus—See Who Logged In Recently
Quick way to summarize last 48 hours of key logins:
|
1 2 3 |
sudo journalctl -g 'Accepted publickey' -S '48 hours ago' \ | sed -E 's/.*Accepted publickey for ([^ ]+) from ([^ ]+).* (SHA256:[A-Za-z0-9+/=]+).*/user=\1 src=\2 fp=\3/' |
Step 6: Beyond Key Logging
Tracking the key is a great start, but for full accountability consider:
- Per-person Unix accounts: best practice, even if they all sudo into a shared role.
- Meaningful key comments: e.g.
lee-laptop-2025. - Sudo I/O logging: record commands and outputs.
- auditd or tlog: log file changes and full TTY sessions.
- SSH certificates: embed identity directly into a short-lived cert signed by your CA.
Conclusion
If you run shared accounts, you must at least log which key was used.
With LogLevel VERBOSE and a little scripting, you can confidently trace access events back to specific individuals—even if everyone logs into the same account.
✅ With this setup, the next time someone makes an unapproved change, you’ll be able to identify exactly whose key was used to log in.




